

You have finished creating your HTML website and you're feeling proud of your hard work. But there is one thing that is still missing: you have no idea how to publish your website.
How to Publish a Website on Netlify
The first method we're going to explore is how to publish your website on Netlify.
Netlify is a platform for hosting websites. It is easy to host sites on Netlify as you don't need to configure it manually – and best of all, it's free. If you haven't signed up for an account, now is a good time to do so.
Here's the step-by-step process of publishing your website on Netlify:
Step 1: Add your new site
Once you've logged in, it will take you to a home dashboard. Click the New site from git button to add your new website to Netlify.

Step 2: Link to your GitHub
When you click the New site from git button, it will take you to the "Create a new site" page. Make sure that you push your repository on GitHub so that Netlify can link to your GitHub account.
Click the GitHub button as shown in the screenshot below:

Step 3: Authorize Netlify
Next, click the Authorize Netlify by Netlify button. This permission is needed so that both Netlify and GitHub can connect.
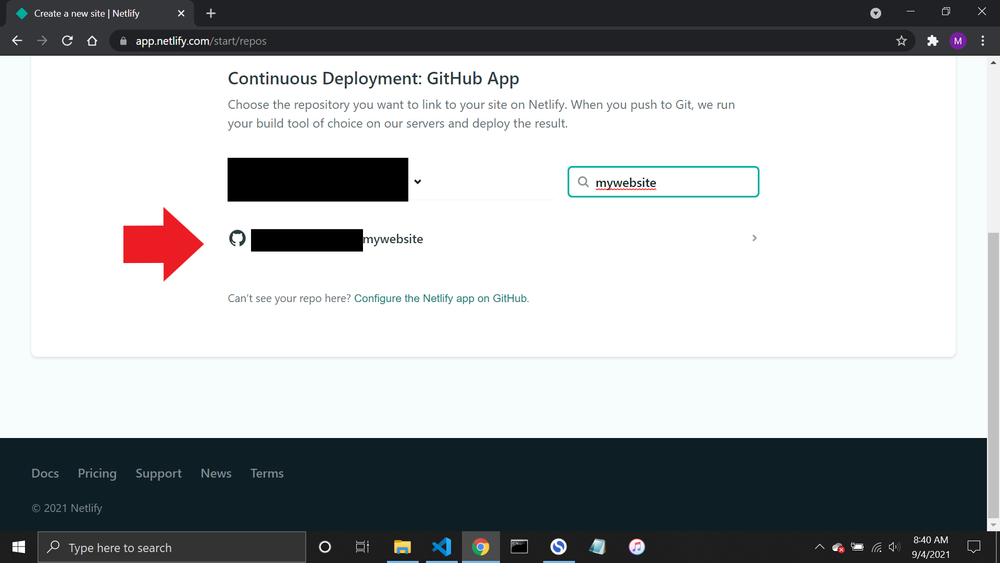
Step 4: Select your repository
Once you grant permission to Netlify, you can see a list of all your repositories. Select your website to publish. You can find it by either scrolling down the list or using the search bar to narrow down the list.


.gif)
0 Comments