This document outlines a roadmap for developing a ReactJS project using Visual Studio Copilot. It covers the essential steps from project setup to deployment, highlighting how Copilot can assist throughout the development process. This guide aims to provide a structured approach for both beginners and experienced developers looking to leverage the power of AI-assisted coding.
1. Project Setup
- Goal: Initialize a new ReactJS project with a basic structure.
- Steps:
Create a new React app: Use create-react-app or a similar tool.
cd my-react-app
Initialize Git repository:
git init
Open the project in Visual Studio Code:
code .
Copilot Assistance:
- Code Generation: Use Copilot to generate boilerplate code for components, event handlers, and basic UI elements. For example, type // Create a simple React component and let Copilot suggest the initial component structure.
- Command Suggestions: Copilot can suggest the correct npm commands for installing dependencies or running scripts.
- Error Explanation: If you encounter errors during setup, paste the error message into the editor and ask Copilot to explain the cause and suggest solutions.
2. Component Development
- Goal: Build reusable UI components.
- Steps:
Plan your components: Identify the different components needed for your application (e.g., Header, Footer, Navigation, Content).
Create component files: Create separate .js or .jsx files for each component in the src/components directory (or a similar structure).
Implement component logic: Write the code for each component, including state management, event handling, and rendering.
Style your components: Use CSS, CSS-in-JS libraries (like styled-components), or UI frameworks (like Material UI or Ant Design) to style your components.
Copilot Assistance:
- Code Completion: Copilot can provide intelligent code completion suggestions as you type, speeding up the development process.
- Component Generation: Describe the desired functionality of a component in a comment, and Copilot can generate the initial code structure. For example: // Create a component that displays a list of items fetched from an API.
- State Management: Copilot can help you implement state management using useState, useReducer, or context. Ask Copilot for examples of how to use these hooks.
- Prop Type Validation: Copilot can assist in defining and validating prop types using PropTypes.
- Code Refactoring: Copilot can suggest ways to refactor your code to improve readability and maintainability.
3. Data Fetching and API Integration
Choose an API: Select an API to fetch data from (e.g., a REST API or GraphQL API).
npm install axios
Fetch data in your components: Use useEffect to fetch data when the component mounts.
Handle loading and error states: Display appropriate messages while the data is loading or if an error occurs.
Copilot Assistance:
- API Request Generation: Copilot can generate the code for making API requests using axios or fetch. For example: // Fetch data from https://example.com/api/data.
- Error Handling: Copilot can suggest error handling strategies for API requests.
- Data Transformation: Copilot can help you transform the data received from the API into a format suitable for your components.
- Caching Strategies: Copilot can provide examples of how to implement caching to improve performance.
4. Routing
- Goal: Implement navigation between different pages or views in your application.
- Steps:
npm install react-router-dom
Define routes: Create a Router component and define the routes for your application.
Create navigation links: Use Link components to create navigation links between different routes.
Copilot Assistance:
- Route Configuration: Copilot can help you configure the routes for your application using react-router-dom. For example: // Configure routes for home, about, and contact pages.
- Navigation Links: Copilot can generate the code for creating navigation links using the Link component.
- Route Parameters: Copilot can assist in handling route parameters.
- Protected Routes: Copilot can provide examples of how to implement protected routes that require authentication.
5. State Management (Advanced)
- Goal: Manage complex application state using a state management library.
- Steps:
Install the library:
npm install redux react-redux
Define your store, actions, and reducers: Implement the necessary components for your chosen state management library.
Connect your components to the store: Use the library's API to connect your components to the store and access the application state.
Copilot Assistance:
- Redux Boilerplate: Copilot can generate boilerplate code for Redux actions, reducers, and store configuration.
- Context API Examples: Copilot can provide examples of how to use the Context API for state management.
- Zustand Implementation: Copilot can assist in setting up and using Zustand for simpler state management.
- Selectors: Copilot can help you create selectors to efficiently access data from the store.
6. Testing
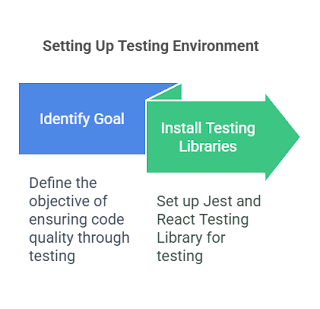
Goal: Write unit and integration tests to ensure the quality of your code.
Steps:
Install testing libraries: Use Jest and React Testing Library.Install testing libraries: Use Jest and React Testing Library.2


.png)
.png)
.png)
.png)
.png)
.png)


.gif)
0 Comments